Huawei P30 Pro camera tips and tricks: great ways to improve your images
The P30 Pro is a cell phone which has incredible picture-taking abilities - that is the reason we have built up this Huawei P30 Pro tips and traps manual for ensure you take advantage of the gadget.
It's a telephone that pursues on from the super-fruitful P20 Pro a year ago and, as should be obvious from our Huawei P30 Pro audit, expands on a portion of the specs highlighted in the Mate 20 Pro which appeared in the last 50% of 2018. It's so great, it's right now top of our best camera telephone manage.
Working together with Leica for its camera tech, it appears that each new Huawei discharge carries with it another spearheading venture forward in exactly what is conceivable in the cell phone world. Not content with a triple-focal point camera line-up, the P30 Pro currently flaunts four distinct optics.
The primary 27mm (comparable) focal point has a 40 megapixel sensor behind it, which has seen its development reconfigured to RYYB (the standard is RGGB) to offer better light-gathering abilities. Gone is the monochrome sensor of the Huawei P20 Pro, rather supplanted by a wide-edge focal point that we saw on the Huawei Mate 20 Pro - with that you get a 16mm equal. Totally new for this model is a 5x optical long range focal point which makes employments of collapsed optics to bring you 125mm (equal).
With respect to the fourth focal point - that is another TOF or Time of Flight camera. It tosses out infrared light into the scene, estimating to what extent it takes for it to come back to the gadget to all the more precisely reproduce shallow profundity of field impacts.
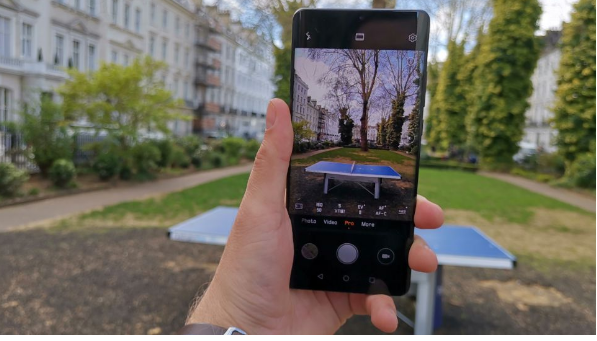
An amazingly well-highlighted camera application is included on the Huawei P30 Pro - as we've seen before on past models. There's likewise Artificial Intelligence, manual controls and crude configuration shooting to get to grasps with.
So in case you're thinking about how to take advantage of your fresh out of the plastic new camera telephone whizz - look at these Huawei P30 Pro camera tips and traps beneath
1. Get to grips with Pro mode
Something we like best about Huawei's local camera application is the very adaptable Pro mode. Use it to assume responsibility for parameters, for example, ISO, shade speed, presentation remuneration, AF mode, white parity and metering.
While the P30 Pro is phenomenal at getting things directly in completely programmed mode, by utilizing the Pro area, you can change things to guarantee the yield coordinates your vision.
This is likewise where you'll discover the incredibly helpful Horizontal dimension, which comes in valuable when shooting scenes to guarantee those skylines are straight - it's particularly worth breaking it out when working with the wide-point (16mm) focal point.
For the individuals who like to change their pictures in after creation, Pro mode is likewise where you'll discover the choice to shoot in crude configuration. It's the "all inclusive" DNG position, which means it tends to be opened in a wide assortment of projects. Discover it in the goals territory of the settings page (pinion symbol).
2. Break out the big zoom

The huge new element of the P30 is the 5x optical zoom. Huawei deals with this accomplishment of designing by utilizing what is known as a "periscope" focal point - collapsed optics which fit conveniently into the space accessible to get you closer to the activity.
Be that as it may, don't limit going above and beyond - the 10x zoom is "half and half", utilizing both optical and advanced zooming advances to get you much closer to the subject. It works surprisingly well and merits considering for those occasions when you can't physically move inside reach.
3. Consider cropping

here is one drawback to the new 5x optical zoom. It abandons you with a quite enormous hole between the standard (27mm) focal point and the fax alternative (125mm). What occurs on the off chance that you need 3x, 4x or 5x the zoom?
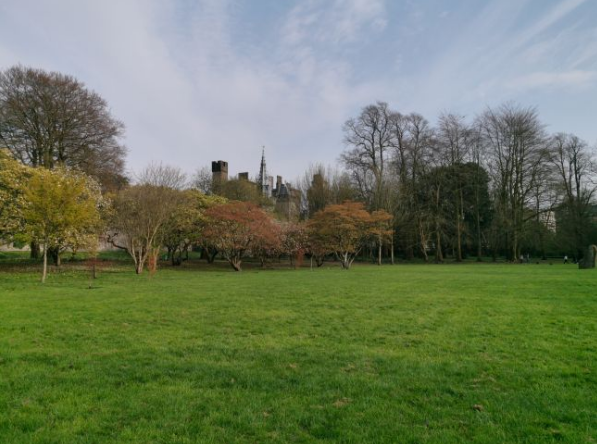
You can depend on computerized zoom legitimately in camera, however another path around it is to shoot at the greatest goals of 40 megapixels (as a matter of course the P30 Pro yields at 10 megapixels) and crop later. By shooting at the super-high goals, even genuinely extraordinary harvests shouldn't experience the ill effects of a drop in pixel tally.
Tap the gear-tooth symbol to change the photograph goals to 40 megapixel. Note - you'll need to leave the 40 megapixel choice in the event that you need to utilize either the wide-edge or the 5x long range focal point once more.
In the model over, the trimmed adaptation of the picture is as yet 5345 pixels wide - all that could possibly be needed to make a genuinely vast print.
4. Switch on HDR

HDR shooting implies that you will have a greater differentiation in the features and shadows of a picture.
In case you're shooting something with zones of high differentiation, exchanging on HDR can hold subtleties in both the shadows and the features.
It can will in general look somewhat phony now and again, so it's likely best to utilize it sparingly. It's a tad of a concealed choice - you'll have to swipe along to the "More" tab and pick it from that point.
Fortunately it's simpler to turn it off when you're set - just rapidly tap the "X" by "HDR" and you'll be straight back to typical shooting.
5. Switch off Master AI

Man-made reasoning works superbly of recognizing whatever it is you're capturing and modifying photographic settings in like manner. In any case, there are times when the outcomes are a tad over the top when all you hunger for is something progressively quieted.
We've prompted turning off AI previously, however with the P30 Pro, Huawei has made this considerably simpler with another immediate access symbol at the top (or left in case you're holding the telephone in scene introduction). Basically tap AI to turn it off - and switch it back on again - at your impulse.
6. Experiment with Mono

The devoted monochrome sensor was a standout amongst the best things about the P20 Pro. It was fit for creating some shocking outcomes. It's been expelled to clear path for a wide-edge focal point, which is presumably the better alternative for most picture takers - fortunately it's as yet conceivable to shoot in monochrome right in the local camera application.
It's likewise been moved to the "More" tab, yet once in it you'll see that you have four distinct choices - Normal for simply pointing and shooting, Aperture for making shallow profundity of field impacts, Portrait for individuals shots and Pro for assuming responsibility for extra parameters (you won't probably shoot crude in this mode however). In spite of the fact that the P20 Pro was likely a touch better at delivering monochrome pictures, you'll be hard pushed to recognize the distinction except if you take a similar photograph with the two models in the meantime and truly examine the distinctions.
7. Utilise super macro mode

Utilizing the very wide edge focal point, too large scale mode is ideal for getting as close as is conceivable to your subject.
It couldn't be simpler to utilize either - in ordinary Photo mode, and with AI exchanged on, simply position the camera amazingly near your subject. You should see the words "excessively full scale" show up at the base of the screen. The detail rendered in this mode is phenomenal and is a genuine reward for cell phone shooters.
8. Create shallow depth of field effects


perture mode is perfect for making shallow profundity of field impacts that impersonate the vibe of shooting with a DSLR or CSC.
It's incredibly easy to utilize - simply swipe to the Aperture mode, tap to concentrate regarding your matter and tap the shade catch. Naturally, the "gap" is set to f/4, however you can modify the dimension from f/0.95 - f/16.
There's likewise an extra trap that you can attempt in the event that you didn't exactly like the impact created. Head to the photograph in your library, and tap the opening symbol. Presently you'll see that you can pick a completely unique center point, just as alter the gap itself.
9. Choose your bokeh

For presented individuals shots, Portrait mode is an incredible choice since it gives you the decision between various foundation "bokehs". This is something we saw with the Mate 20 Pro, with a couple of new choices being included for the P30 Pro.
In Portrait mode - tap the round symbol, and you'll see a scope of various alternatives accessible. Some of them are somewhat gimmicky - like the hearts choice - however they're fun none the less. Others, for example, circles and whirl are more "reasonable" in the event that you like, and are positively worth trying different things with.
10. Low-light options

Another incredible component of the P20 Pro, and the consequent Mate 20 Pro was exactly how well it dealt with low light circumstances on account of the "Night" mode.
This works by consolidating a progression of short exposures together to make the impact of a more extended presentation - all handheld and combined with the enchantment of man-made reasoning.
That is as yet accessible here on the P30 Pro and can be utilized for extraordinary impact. In any case, the sensor has been improved to the point where shooting in practically total murkiness still outcomes in some great outcomes - without the requirement for Night mode to be actuated.
In case you're attempting to snap a photo rapidly - or of a moving subject - it merits maintaining a strategic distance from Night mode and simply perceiving how well the sensor adapts individually.
Advertisement

0 Comments
Post a Comment